Monday, November 12, 2007
Well precisely...
Thursday, November 08, 2007
Creeping forwards
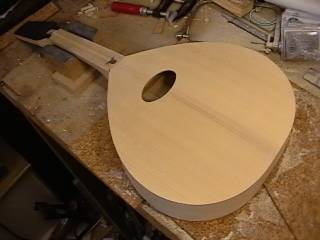
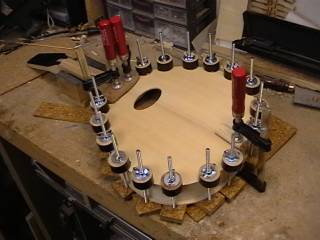
I managed to squeeze in a couple more sessions in the garage. I have glued on the back and fitted the banding to cover the join. I have also fitted a new set of frets (which went well) and drilled out the holes for the tuners. This latter job was a bit sloppy, and one of the holes has ended up oval - I can cover it up but it was a bit slack. Less than Zen.
Sunday, September 23, 2007
Mandolin banjo - progress report
 I want to get this one finished as soon as possible, so I can start my next proper project (an octave mandola, in walnut). I have made a new rim (constructional maple veneers bent round a mould), and I am going to glue the base on next. This (also in the photo) is a nice bookmatched maple veneer, glued to a thin plywood base. The join will be hidden by a binding round the base.
I have cleaned up the old neck and fitted a new peghead veneer - I have still to put the new frets in, fit the nut and fit a set of tuning machines.
Friday, May 11, 2007
Wednesday, May 09, 2007
Its Finished
Friday, March 16, 2007
Hanging around
The dulcimer is now ready to finish off with Tru-oil. I have put up a sort of gallows in the garage to hang it up for the finishing process. I've tried to make it nice and strong, given what happened with the mandolin! The new pegs (rosewood) arrived and I'm happy that I've made the right decision to use them rather than the (plastic!) adjustable ones. I have had to order a peg shaver though.
Looking ahead, I've been thinking about the next instruments. Currently I'm minded to attack the obsession as follows:
1. Finish off the restoration of the mandolin banjo (I've already cut out the new wood to replace the stuff that went moldy).
2. Make the 'Microlin'. This will be an electronic practice instrument with a built in amplifier - the electronics will be a challenge but I've bought the bits and a beginners electronics starter kit.
3. F-mandolin - So far I've made the mould.
4. Octave mandolin in walnut (following the John Troughton book). Maybe two - why not!
Sunday, February 18, 2007
Nearly there...

Well, nearly there. I've added the bindings and made the nut and bridge for each end. I strung up one side for a bit of a test. The sound was very pleasing - louder than I thought, with quite a rich tone. The next step is to clean everything up and apply the finish - I will be using Tru Oil as I did for the mandolin. I'm also not entirely happy with the pegs (they are adjustable), and I may get some plain wooden (ebony) ones.
Monday, January 01, 2007
Close-up
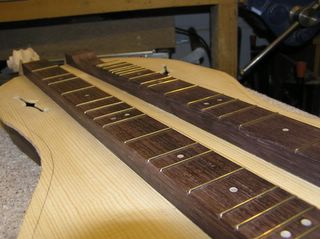
In close-up. I should also mention that the mandolin banjo is a bit stalled. Basically the wood bending went well but I left the pieces to dry in an old biscuit tin. Unfortunately, there must have been some mold spores present as the wood turned into a multicoloured fungus garden! Back to the ordering catalogue I suppose.
Happy New Year
Wednesday, October 18, 2006
Birthday presents

Thank you, first of all, to my Sister & Family who gave me some wood (little did they know it!). The flamed maple veneer will be used for the bottom of the mandolin banjo pot, and the maple strips will be bent into hoops to form the sides. The thin strip is edge banding.
I made a bit of progress this evening - I have started on the mould for the pot (wheels of plywood glued together) and I also made a peghead veneer (as the original was painted!) out of ebony and glued it onto the neck.
My own family have equiped me with a new router which I need to make a table for...more projects and the porch still isn't finished.
Sunday, October 08, 2006
Fitting the new goatskin
Sunday, September 24, 2006
Dulcimer Fretboard
...is now in bits
Friday, September 15, 2006
Thursday, September 14, 2006
Getting going again
I have to admit that progress has been extremely slow. However, after my decision to do a lot less inlay work, things have started up again. I bought two more fretboard blanks, this time in Indian rosewood, and I have now started working on the fretboards themselves.
So as to become even more distracted, I have also bought an old mandolin banjo on ebay, and it's a bit of a wreck. It needs a new skin, a new pot, a new bridge, new tuners and the frets need replacing! There will be very little of the original left when I've done with it.
So as to become even more distracted, I have also bought an old mandolin banjo on ebay, and it's a bit of a wreck. It needs a new skin, a new pot, a new bridge, new tuners and the frets need replacing! There will be very little of the original left when I've done with it.
Sunday, August 27, 2006
more lack of progress
Still no progress, but I have now decided to scale back on the inlays. I think that this is what's really holding me back. So, I just need to get round to buying two more rosewood fretboards and then there can be no excuses! On a related note, I made my first e-bay purchase yesterday, a battered-looking mandolin banjo - I hope it arrives.
Tuesday, August 08, 2006
Holiday Blog
It's been ages since I last posted anything, and there has been very little progress on the dulcimer. The soundboard now fits, but I haven't started on the fretboards yet. I ended up buying some santos rosewood but I don't really like it so I will buy some bits of Indian instead.
I am currently on holiday in Skiathos which I recommend. There is some great walking, and I've heard some fine bouzeki playing in a couple of tavernas. I have just finished reading 'Zen and the Art of Motorcycle Maintainance' which I have been hankering after reading for ages. I was not disappointed - it was fantastic and I hope it will influence my woodworking positively
I am currently on holiday in Skiathos which I recommend. There is some great walking, and I've heard some fine bouzeki playing in a couple of tavernas. I have just finished reading 'Zen and the Art of Motorcycle Maintainance' which I have been hankering after reading for ages. I was not disappointed - it was fantastic and I hope it will influence my woodworking positively
Tuesday, June 27, 2006
Sunday, May 07, 2006
Out of the mould
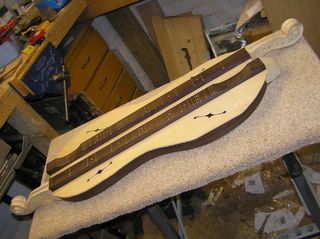
Well, it's out of the mould, and I've trimmed the overlapping edges of the bottom, and cleaned up the ends. All together, I'm very pleased - it's starting to look like an instrument, and the wood has a certain resonance when I tap it. The next step is to make the two fretboards and fit the top - I really don't think I will get it ready by the 5th July, but you never know.
Monday, May 01, 2006
Gluing The Back On
Monday, April 17, 2006
Starting to come together

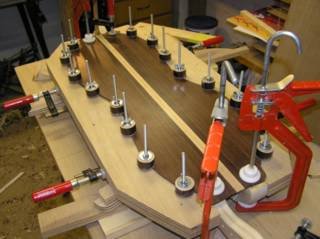
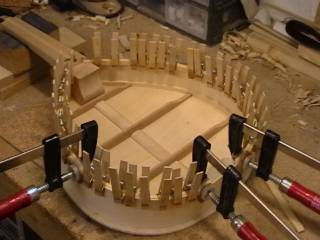
The Easter holidays have allowed me to sneak off into the garage and at last I seem to be getting somewhere. I have wrestled the bent sides into the mould and glued the whole thing up. I have also made some kerfed linings (a first for me), and you can see them in the picture, held in by part of my clothes peg collection. The next job will be to fit the back.
Thursday, April 13, 2006
A Twist in the Tale
Nothing to do with musical instruments, but congratulations to my Dad (and my Mum) on the publication of some of my Dad's poems in his book: "A Twist in the Tale". The ISBN is 0-9552614-0-6, it is £6.95, but I don't know yet how it will be sold and distributed. I think it's fantastic!
Sunday, April 02, 2006
Bending the sides
Wednesday, March 29, 2006
Arrivals
The wood for the sides and the fretboards has arrived, as have the bindings and some more mother of pearl. I have just read a fantastic little book, Zen Mind, Beginner's Mind, which has reminded me that I must keep striving for quality. So, time to tidy up the garage....
Thursday, March 16, 2006
Why so long
I haven't added any posts for a while, mainly because I have made little progress over the past month. However, I am about to order wood for the sides, and some of the other bits and pieces I need.
I have also being giving a lot of thought to my next project. I have decided to make another minature solid body mandolin, my 'microlin TM'. This time I intend to build in an amplifier and an MP3 player into the body, with a loudspeaker or headphone to listen. It will be strung with double course metal strings so will need more neck strength than my previous one. The idea is an instrument for silent practice with a backing track (MP3 from a midi).
I have also being giving a lot of thought to my next project. I have decided to make another minature solid body mandolin, my 'microlin TM'. This time I intend to build in an amplifier and an MP3 player into the body, with a loudspeaker or headphone to listen. It will be strung with double course metal strings so will need more neck strength than my previous one. The idea is an instrument for silent practice with a backing track (MP3 from a midi).
Sunday, January 15, 2006
Back and front
Monday, January 09, 2006
Sunday, January 08, 2006
Some of this year's Christmas Cards
Saturday, January 07, 2006
An Unsymmetrical Mistake
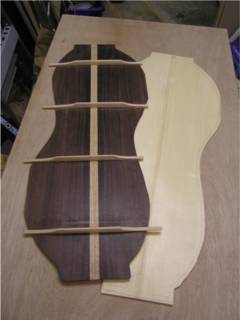
A bit of a near disaster today. I finished off cleaning up the back, and then cut out the shape based on my template. However, I should have turned the template over before drawing the outline. My dulcimer is not symmetrical (it has rotational, but not mirror symmetry), so I ended up with the best surface on the inside. Blast! Anyway, I had to sand and scrape the other side and it turned out fine.
I have now made and started to fit the cross braces - I am using four in a simple ladder arrangement.
I have now made and started to fit the cross braces - I am using four in a simple ladder arrangement.
Tuesday, January 03, 2006
The pickle has gone
Everything seems to be sorted out now, and I have been able to include a picture of my mandolin (scroll down, and it's on the right).
Monday, January 02, 2006
The Back & a museum trip
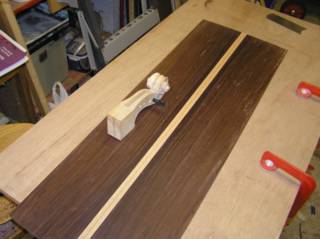
I made a bit more progress over the Christmas break. The two pegheads are now more or less finished, and I tried fitting one of the pegs for fun. I also made a start on the back. My two pieces of rosewood were too narrow, so I have included a laminate of oak with a narrow central strip of mahogany down the middle to widen it out a bit. It's still not as wide as my original plan, but it will have to do (i.e. the design has now been modified!). The rosewood is proving difficult to get a completely clean finish on, scraping and sanding both leave rough patches which you can see in the picture above.
On a different note, I took my older lad to the British Museum today to see the 'Lost Kingdom' Exhibition of artifacts from ancient Persia. It closes on the 8th of January, but we both thought that it was excellent.
Thursday, December 22, 2005
Sunday, November 13, 2005
Working on the scroll

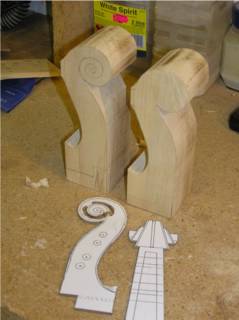
A bit of progress on one of the two scrolls over the weekend...I'll get both to the same state before cutting the channels where the pegs go. It also appears that I will have to make my own reamer (Touchstone tonewoods let me down). It will be a bit like Luke Skywalker constructing his own lightsabre, so I'll expect a "well done" from Darth.
Sunday, November 06, 2005
Pegheads

There's a bit going on here. The wood arrived from Touchstone (unfortunately the material for the ribs was missing) - Indian rosewood for the back and spruce for the front. Four of the pegs are also in the picture. The pegheads have advanced a little and I'm ready to start working on the scroll carving. The clock's ticking though, only 241 days left...
Monday, October 24, 2005
Ordered
I've now ordered the wood for the back, ribs and soundboard, in rosewood and spruce respectively, from the ever helpful touchstone tonewoods. I have also bought two sets of Schaller adjustable pegs. I was torn between these and the traditional ones, so I hope I chose right. The wood for the top and bottom is a bit narrower than I wanted so I'll either modify the design a bit, or put a contrasting piece of veneer down the middle.
My birthday shot by the other day, and my family bought me a couple of the Siminoff books (this one and that one). The bluegrass mandolin looks very tempting for my next choice, or will the archtop guitar win out - next decade - arrgh.
My birthday shot by the other day, and my family bought me a couple of the Siminoff books (this one and that one). The bluegrass mandolin looks very tempting for my next choice, or will the archtop guitar win out - next decade - arrgh.
Saturday, October 08, 2005
The moulds
A large lump of sycamore
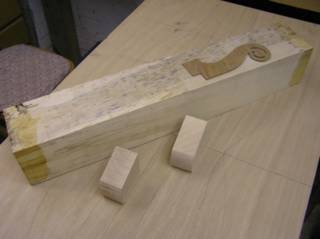
The sycamore for the heads was ordered from Craft Supplies. They were out of stock of the size I needed, so I got this giant lump. You can see the template for a size comparison. I have quite a lot of sawing ahead of me! In the front are the two tail pieces in the making.
Walnuts
Headstock Plan
Thursday, September 15, 2005
Annoyed
I was quite chuffed this evening to find a couple of comments on my recent post. Ah-ha I though, someone has expressd an interest in courting dulcimer moulds...but no, it was just SPAM - advertising for free something or other. I have deleted them. I hope that there isn't some machine out there automatically posting comments to blogs.
The Mould in the making
Wednesday, September 14, 2005
A tiny bit of progress
I have managed to find half an hour or so this evening and made a start on the mould. Two out of the four bits are cut out. Once the rest of the bits are made I will bolt them to a base board. I am hoping that it will be possible to reconfigure the mould so I can work on the top or bottom of the dulcimer, or to use it to make a single course one.
Friday, September 09, 2005
Ukulele Orchestra Great Britain
I heard this lot on the radio on the way home - playing at the Edinburgh Festival (I think). Radio 4 Live (30 min) Broadcast on Radio 4 - Fri 09 Sep - 18:30. If they are ever in the area I would love to hear them live.
Their web site
Their web site
Sunday, September 04, 2005
Friday, September 02, 2005
Oops
My lovely wife has spotted the large lump of wood in the garage. This is hardly surprising as it's 8 foot long and 4 foot wide. "Are you making another musical instrument?" she enquired. "well...maybe" was all I could muster. I really must get those doors hung...
Thursday, September 01, 2005
More Supplies
I now have a large (very) sheet of plywood taking up most of my garage. I'm going to hack this up to make the mould for the dulcimer. However, some dee-eye-why is taking priority and I really have to get some doors hung first.
Monday, August 29, 2005
The Start of the Dulcimer
Construction has begun with just 310 days left. I've made a start on the two head blocks (at the bridge end). My first attempt was rubbish - I cut the wood badly and, rembering the quest for perfection, I chucked it out. The current bits look better.
Friday, August 12, 2005
Rebetika No 1
I bought the CD of the above title in Kefalonia airport - it features Glykeria-agathonas and michalis genitsaris. It's rather good...
Dulcimer plans
Well, I'm back off holiday, and I did manage to do a bit of work on the drawings. I have decided to make the dulcimer in celebration of 20 years married to my lovely wife. This, I hope, will force the pace of the project and will give my until early July 2006 to get it finished. I have decided to make it quite ornate with, for example inlaid fretboards (two, since it's a courting dulcimer). I have finished the fretboard inlay design - it is a vine with 20 leaves representing...well it's not too difficult to work that one out! I also want to use a decorative binding around the edges of the instrument. It's my intention that doing this decorative work will help me with the archtop guitar(s?) planned for 2007....
Saturday, July 23, 2005
Dulcimer drawings
I'm going to try and complete my dulcimer drawings over the next two weeks. Pencils have been sharpened...
Wednesday, June 22, 2005
Plans plans plans
Just for the record, it is my intention to make a double course 'courting' mountain dulcimer next, and after that an archtop guitar, following Bob Benedetto's book. After that...
A well made cookie tin mandolin?
A violin?
An archtop mandolin?
A lute or a bowl-back mandolin
...though perhaps I'll never have time.
A well made cookie tin mandolin?
A violin?
An archtop mandolin?
A lute or a bowl-back mandolin
...though perhaps I'll never have time.
Monday, June 06, 2005
Bridge Making
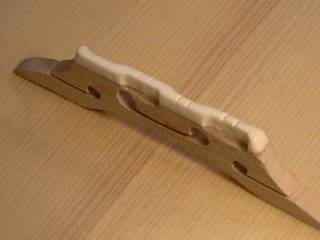
Now that I've finished the mandolin, I've been able to make a new bridge for my bought one (Blue Moon, from Hobgoblin). I used the same compensated design (maple with a bone saddle), and I also made the slots in the nut a bit deeper to lower the action. It sounds much better now - louder and more resonant, although it's developed a slight buzz which I will need to fix by dressing one of the frets. Picture to follow in a day or two.
Friday, June 03, 2005
Sunday, April 17, 2005
Monday, March 28, 2005
It sings!
Today I fitted the tuning machines and the tailpiece, and made a cover for the truss rod hole. I then strung the mandolin up to pitch and...played it. The strings still need a bit of time to bed down, and I will have to do a second fit of the bridge in a week or so, but I'm very pleased with the tone. Picture to follow in a day or so
Wednesday, March 16, 2005
DISASTER
Bit of a crisis this evening. I went to put the next coat of oil on and found that the hook holding up the mandolin had broken and the mandolin was lying on the garage floor. There was a big chip missing from the back and worse still, when I tapped the back, there was a buzzing noise as if one of the tone bars had come loose. I felt very depressed all of a sudden as this would render the instrument into the equivalent of firewood... However, after a more detailed investigation I found that the buzzing came from the truss rod nuts which were not fully tight. Phew. I have now inlayed a small peice of sycamore into the back to replace the missing chunk. Its far from perfect, and looks quite ugly, but at least it will be playable. Next time... Anyway, to cheer myself up I am going to order a tailpiece from Hobgoblin.
Sunday, March 13, 2005
Finishing with Oil
The Bridge with bone saddle
Saturday, March 05, 2005
Filling some gaps
I'm ready to apply the finish now, but I noticed a couple of places where there was a small gap between the ebony bindings and the ribs (about 0.2 mm I think). I decided to fill these before proceeding with the finish, so I made a paste of 1 part ebony dust (made with a file) a 1 part quick setting araldite epoxy adhesive. I've applied this and will sand/scape it down in a few minutes.
Monday, February 28, 2005
Nuts
Well, I dressed the frets without mishap, and then decided to cut the slots for the strings in the nut. All was going well until the bit between the two 'G' strings broke off and fell onto the garage floor (the bone is more brittle than I thought). After grubbing about in the sawdust for a bit, I gave up searching for it and made a new piece (it's about 3mm x 3mm x 3mm!) and stuck it in with superglue. After I had ground it down, I refiled the slots and knocked it out...onto the garage floor. After grubbing about... (you've heard this bit already). So I made another bit, and this time it seems to be fine. I am now ready to apply the finish - I've chosen Tru-oil, nornally used for the stocks of guns.
Sunday, February 13, 2005
Fretting
I kept staring at the frets and in the end I decided that the were not good enough. Especially near the sound hole, several were sitting too high, so I ripped seven of them out! The slots needed cleaning out, and I refitted the frets after filing off the tangs, and then stuck them back in with the use of some superglue.
Sunday, February 06, 2005
Friday, February 04, 2005
Lists
In daydreaming about making musical instruments I have been making a mental list of some of the tools I would like to have:
A safe-T planer for my drill press
A thickness sander
I may make my own, perhaps along the lines of the one in the stew mac catalogue.
Finger planes for when I carve an archtop instrument
A router table, perhaps an overhead pin router - maybe I'll make my own
A 1/4 sheet palm sander
A better way of getting rid of dust!
I reckon the list will grow
Sunday, January 30, 2005
Slow Progress
I have fitted the nut, and the first five or so frets. I had to refit the first one as it wouldn't go right in- I think the bottom of the slot had some glue or something in it. This bit is a bit more difficult than I thought!
Sunday, January 23, 2005
Bone Smells!
This afternoon I fitted the nut and made a bone saddle for my new bridge. Bone smells horrible when its worked (especially with power tools), and I also have the BSE question in the back of my mind as I generate clouds of bone dust. I have the vacuum cleaner running the whole time, but still I worry... The nut will be fine I think, but the bridge looks as if it will make the action too high. I may have to remove rather a lot of material from the feet and so will get close to the little winged holes.
Saturday, January 15, 2005
New Bridge

I have just made a new bridge out of hard maple based on the Red Henry design. I will add a bone saddle.
The snail inlay

I decided to put the the snail inlay in the mandola, and I'm glad I did - it didn't work out quite as I had hoped. When I sanded and filed down the silver wire it heated up and lifted out, so it got thinner and thinner. Finally it crumpled up, hence the repaired gap. Still, I've learnt something for the next inlay.
Saturday, January 08, 2005
Machine heads
I have just ordered a set of Schaller Machine heads (M6 mini in chrome) - sixty quid (gulp). Also some bone for the nut and bridge saddle - nut and frets next...
Monday, January 03, 2005
Most of the woodwork is finished
Sunday, January 02, 2005
Fretboard & inlay
I've just glued on the fretboard, so an anxious six hours awaits. Also, I had a play with a an offcut from the Ablam shell. I have found that even a light sanding exposes areas of resin, so I'm going to hold off on inlaying the peghead at the moment.
Fully bound

It's been a productive day in the workshop. I have glued on and scraped down the ebony bindings. It was a bit messy, and there are a couple of very small gaps to fill. Also, it took ages to scrape down the excess, which I will have to remember for the next instrument. I have also made the wooden shim that goes under the fretboard, and shaped the end of the fretboard to match the soundhole.
The peg head inlay
Wednesday, December 29, 2004
One more thing
I have been helping my daughter make a cookie tin banjo today - great fun! Also, my lovely wife bought me the Robert Benedetto archtop guitar making book for Christmas - another project methinks...
Binding Ledges

I cut the ledges for the ebony bindings using the little dremmel tool that came from Stew Mac. Unfortunately, it was a bit more brutal than I thought it would be, and was not quite as accurate as I had hoped. However, my homemade scraper (old bit of saw blade in a beech housing) came to the rescue and I reasonably happy with end result.
I will try and put the bindings in before the new year.
Saturday, December 18, 2004
It looks like a mandolin
Its nearly midnight, but the belly is on and trimmed and sanded and I'm mighty pleased with progress.
Friday, December 17, 2004
Gluing on the belly
Monday, December 13, 2004
a sound attempt
Herewith an attempt at a short recording made with the solid-body mandola. Not exactly rock and roll I know, and it took a while for me to figure out how to do it. The recording was...
made using the line-out from my little amp plugged directly into the line-in on a computer
transferred as a .wav file to another computer on a floppy disk
burnt onto a CD
ripped back into an MP3
and finally FTP'd
phew
made using the line-out from my little amp plugged directly into the line-in on a computer
transferred as a .wav file to another computer on a floppy disk
burnt onto a CD
ripped back into an MP3
and finally FTP'd
phew
Sunday, December 12, 2004
Friday, November 26, 2004
belly
I've just this minute completed the fitting of the belly, and it's ready to glue on. I had one moment of panic when the masking tape I used to hold it temporarly in place tore a few fibres out of it, but since there is still a final sanding to come it will not be a problem. I will have to watch it later, though, when fitting the bindings. I now have to prepare my makers label and stick it in before the 'lid' finally goes on.
Monday, November 15, 2004
Madeleine Peyroux
Just heard Madeleine Peyroux singing on the radio this evening - nothing to do with mandolins, but I thought she was fabulous.
Monday, November 08, 2004
The belly linings
I fitted these yesterday (see below), fixed on with my collection of sawn-off clothes pegs! I'm still a bit peeved that the neck is a degree or so out of true, but I'll learn for next time - don't trust red cotton....
Subscribe to:
Posts (Atom)


