Just for the record, it is my intention to make a double course 'courting' mountain dulcimer next, and after that an archtop guitar, following Bob Benedetto's book. After that...
A well made cookie tin mandolin?
A violin?
An archtop mandolin?
A lute or a bowl-back mandolin
...though perhaps I'll never have time.
Wednesday, June 22, 2005


Monday, June 06, 2005
Bridge Making
Now that I've finished the mandolin, I've been able to make a new bridge for my bought one (Blue Moon, from Hobgoblin). I used the same compensated design (maple with a bone saddle), and I also made the slots in the nut a bit deeper to lower the action. It sounds much better now - louder and more resonant, although it's developed a slight buzz which I will need to fix by dressing one of the frets. Picture to follow in a day or two.
Friday, June 03, 2005

Sunday, April 17, 2005

Monday, March 28, 2005
It sings!
Today I fitted the tuning machines and the tailpiece, and made a cover for the truss rod hole. I then strung the mandolin up to pitch and...played it. The strings still need a bit of time to bed down, and I will have to do a second fit of the bridge in a week or so, but I'm very pleased with the tone. Picture to follow in a day or so
Wednesday, March 16, 2005
DISASTER
Bit of a crisis this evening. I went to put the next coat of oil on and found that the hook holding up the mandolin had broken and the mandolin was lying on the garage floor. There was a big chip missing from the back and worse still, when I tapped the back, there was a buzzing noise as if one of the tone bars had come loose. I felt very depressed all of a sudden as this would render the instrument into the equivalent of firewood... However, after a more detailed investigation I found that the buzzing came from the truss rod nuts which were not fully tight. Phew. I have now inlayed a small peice of sycamore into the back to replace the missing chunk. Its far from perfect, and looks quite ugly, but at least it will be playable. Next time... Anyway, to cheer myself up I am going to order a tailpiece from Hobgoblin.
Sunday, March 13, 2005
Finishing with Oil
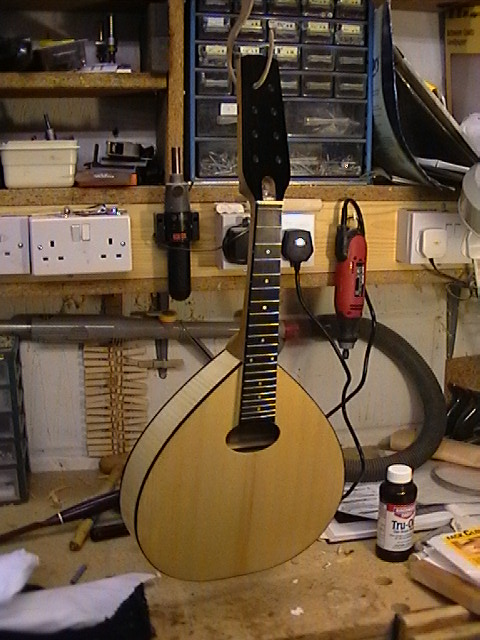
Here is my mandolin, drying after its third coat of finishing Oil. I thing that three or four more coats should do...
The slotted nut

The nut with slots. On the right hand side you can see the bit that kept breaking off.
The Bridge with bone saddle
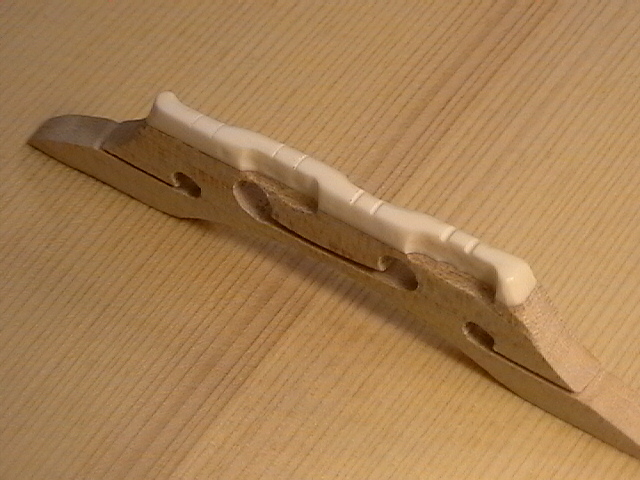
I am quite pleased with the bridge. The only thing I'm a bit worried about is if I will need to trim too much off the bottom when the strings are fitted.
Saturday, March 05, 2005
Filling some gaps
I'm ready to apply the finish now, but I noticed a couple of places where there was a small gap between the ebony bindings and the ribs (about 0.2 mm I think). I decided to fill these before proceeding with the finish, so I made a paste of 1 part ebony dust (made with a file) a 1 part quick setting araldite epoxy adhesive. I've applied this and will sand/scape it down in a few minutes.
Monday, February 28, 2005
Nuts
Well, I dressed the frets without mishap, and then decided to cut the slots for the strings in the nut. All was going well until the bit between the two 'G' strings broke off and fell onto the garage floor (the bone is more brittle than I thought). After grubbing about in the sawdust for a bit, I gave up searching for it and made a new piece (it's about 3mm x 3mm x 3mm!) and stuck it in with superglue. After I had ground it down, I refiled the slots and knocked it out...onto the garage floor. After grubbing about... (you've heard this bit already). So I made another bit, and this time it seems to be fine. I am now ready to apply the finish - I've chosen Tru-oil, nornally used for the stocks of guns.
Sunday, February 13, 2005
Fretting
I kept staring at the frets and in the end I decided that the were not good enough. Especially near the sound hole, several were sitting too high, so I ripped seven of them out! The slots needed cleaning out, and I refitted the frets after filing off the tangs, and then stuck them back in with the use of some superglue.
Sunday, February 06, 2005
Friday, February 04, 2005
Lists
In daydreaming about making musical instruments I have been making a mental list of some of the tools I would like to have:
A safe-T planer for my drill press
A thickness sander
I may make my own, perhaps along the lines of the one in the stew mac catalogue.
Finger planes for when I carve an archtop instrument
A router table, perhaps an overhead pin router - maybe I'll make my own
A 1/4 sheet palm sander
A better way of getting rid of dust!
I reckon the list will grow
A safe-T planer for my drill press
A thickness sander
I may make my own, perhaps along the lines of the one in the stew mac catalogue.
Finger planes for when I carve an archtop instrument
A router table, perhaps an overhead pin router - maybe I'll make my own
A 1/4 sheet palm sander
A better way of getting rid of dust!
I reckon the list will grow
Sunday, January 30, 2005
Slow Progress
I have fitted the nut, and the first five or so frets. I had to refit the first one as it wouldn't go right in- I think the bottom of the slot had some glue or something in it. This bit is a bit more difficult than I thought!
Sunday, January 23, 2005
Bone Smells!
This afternoon I fitted the nut and made a bone saddle for my new bridge. Bone smells horrible when its worked (especially with power tools), and I also have the BSE question in the back of my mind as I generate clouds of bone dust. I have the vacuum cleaner running the whole time, but still I worry... The nut will be fine I think, but the bridge looks as if it will make the action too high. I may have to remove rather a lot of material from the feet and so will get close to the little winged holes.
Saturday, January 15, 2005
New Bridge
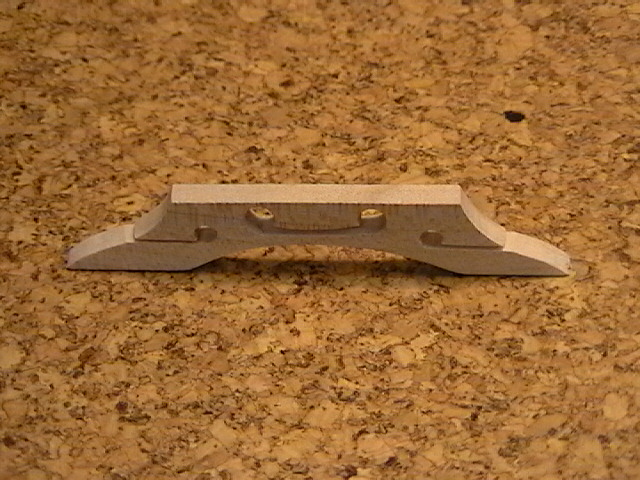
I have just made a new bridge out of hard maple based on the Red Henry design. I will add a bone saddle.
The snail inlay

I decided to put the the snail inlay in the mandola, and I'm glad I did - it didn't work out quite as I had hoped. When I sanded and filed down the silver wire it heated up and lifted out, so it got thinner and thinner. Finally it crumpled up, hence the repaired gap. Still, I've learnt something for the next inlay.
Subscribe to:
Posts (Atom)


 Posts
Posts