Search This Blog

Sunday, February 17, 2013

A bit more work on the 'mystery instrument'.

I have done a little more on the 'mystery instrument' this weekend (it shouldn't be too hard to guess what it is!). The sides (and back) are cherry, which was quite nice to bend. I used to soak wood before bending it, but since working on the bowlback mandolin, I have discovered that this is not necessary (unless it's really thick).

The form is made from pieces of 1" plywood glued together. This is quite expensive to buy new, but I discovered a nearby social enterprise called Chiltern Wood Recycling, that sells ideal materials for this sort of use.

Thursday, January 31, 2013

Lute Bridge

I've been making a bridge for the lute. It turns out that these are quite complicated affairs - deeper and fatter at the bass side, with some fiddly 'scrolls' and undercuts. While it's being made, the bridge is best supported in a special jig which I had to make first. I scratched my head over how to make the right profile for the jig (I certainly don't have any router bits that would fit the bill) and then I remembered the trenching plane that used to belong to my Dad, and before this my Grandfather! It did a great job - who needs electric routers!

The bridge can now be glued to the belly (with hide glue) prior to tap tuning.

Saturday, January 26, 2013

Cittern Ready for Shipping

Here is the cittern ready for shipping in its custom crate. Fingers crossed that no one drives a forklift over it!

Wednesday, January 23, 2013

Cittern Soundfile

Here is quick recording of the cittern. All the courses from open to the 21st fret, followed by a bit of messing about - my playing skills do leave a lot to be desired!

Sunday, January 20, 2013

A Mystery Instrument

I've had some interest in my Cittern, so I tuned it up to pitch to check it over. The bottom course was a bit 'growly', and I have found that the action is a little too low, so I have made a start on fixing this by adjusting the bridge feet a bit. Everything else seems in good order so I just need to find a good way to ship it safely, and to confirm that the potential new owner is willing to go ahead.

All the bars on the lute are now glued in place and I have made a start at trimming them to exact length. On the lute they play an important role in the structure of the whole instrument (which doesn't have any lining) as well as the tone, so this has got to be accurate.

Finally, I have started work on a mystery instrument. I can't reveal what it is because it will be a present for someone, but so far I have prepared some cherry wood for the back and sides, and made the belly. Here is a photo of pieces for the rosette inlay in preparation on a template I turned on my lathe.

Monday, January 14, 2013

Inexpensive Bindings

A while ago I bought some binding from Stew Mac. I was really happy with the results, but I thought it was an expensive option at £3.60 a meter (plus shipping and tax!) so I decided to make some of my own. I started by preparing a piece of sycamore about 60cm long by 5cm by 0.5cm. I cut a couple of bits of black stained veneer and one of unstained sycamore (5cm by 60 cm) and laminated a sandwich using Titebond glue. When the glue had set I planed one edge true and then used a small bandsaw to slice off 3mm . I then planed the newly sawed edge of the 'sandwich'  true again and bandsawed off another slice. In the end I had a pile of bindings each with one good face and one rough sawn one. These went through the drum sander to finish them down to 2mm thick and ...voila!

Sunday, January 13, 2013

The bars

I have now started gluing on the bars. These add strength to the belly (which is less than 2mm thick) but also allow it to be 'tuned'. By reducing the thickness and shape of the bars, the stiffness of particular parts of the belly can be changed which will alter the tone and loudness of the instrument. There isn't room to clamp these all at once, so I am doing them a few at a time. I found that putting a small piece of veneer under the middle of the caul (the bit of wood that spreads the clamping pressure) I could get the middle of the bar to stick down properly (I could see the glue squeeze out). You can also see in the photo (most of) the rosette template which I decided not to remove, as I thought it would strengthen the delicate wood a bit.

I took the  dimensions for the bars from the plans, and they looked tall and narrow, compared to what I was expecting. I recently read an interesting article  written by David Hurd (of left-brained lutherie fame) and it seems that the stiffness of a bar is directly proportional to its width, but proportional to the cube of the height. So tall thin bars can be stiff without being too heavy (which would dampen the resonance of the belly).

Sunday, January 06, 2013

Rosette

I joined the two halves of the belly and thicknessed it down to about 1.8mm. The area for the rosette was then scraped down from the inside to a thickness of around 1mm. The photo shows the lute rosette after the initial cutting out. The paper pattern was glued to the inside and the fragments were cut out with a scalpel. The next step will be to carve the relief (to give an intertwined appearance) and to chip carve a ring around the outside. Once all this is done I can mark out the final size of the belly and get on with finishing the bowl!

Thursday, December 27, 2012

A Halloween horror show

The lute body is now out of the mould and I have attached the neck blank (with a screw through the neck block and a coupe of alignment dowels). In the upper photo, lit from the outside, the view isn't great but it's not a complete disaster. I have fitted a rather 'rustic' patch where one of the ribs was too thin and some of the spacers are not as clean as they should be where my glue and ebony dust mixture has squeezed through some of the gaps.

However, real horror show can be seen in the lower photo. This was lit from behind and taken with the flash off. The horrible wavy grain is clearly visible, and the bright streaks show gaps in some of the joins between the ribs. I have reinforced these from the inside with some Araldite, and once the shape of the belly has been scribed I will add some paper strips to provide further support.

I was going to crack on with this immediately, but I learnt from my lute book that shape of the belly has to be taken while the body is still in the mould.  Once it's out of the mould, the body 'relaxes' and ends up longer and thinner!

Consequently, I have now started on the belly.

Monday, December 17, 2012

Irritated by spam

I have been overwhelmed with spam as comments from 'anonymous', and although they get filtered out by the system I still get dozens of irritating notifications. I have therefore removed the ability for anyone to submit anonymous comments. However, if you are a real human being (rather than a spambot selling shoes), I would love to hear you comments!

many thanks, Richard


Sunday, December 09, 2012

The lute is fighting back

I am finding the lute really frustrating - hats off to all the luthiers out there!! Working with the very thin yew wood is a pain and there seems to be no room for any inaccuracies. Unlike the bowlback mandolin, there is no tail block - instead the 'end cap' is added to the outside and a 'countercap' is put on the inside after the lute body is removed from the mould. This means that if there are any stresses,  a rib at the tail end will tend to 'peel away' from its next door neighbour.

This happened a lot!

I had fixed the middle rib to the mould  with a tiny screw, but I should probably have done this for the rest of them too.

Anyway, the photos show the making of the end cap, with its black veneer binding. After cleaning it up with a cabinet scraper I bent it into shape on the iron and glued it into place with Titebond.

This has strengthened the tail end considerably, but I have plenty of  cracks, holes and tiny knot holes to fix. I am going to work through these with Araldite epoxy glue mixed with ebony dust.

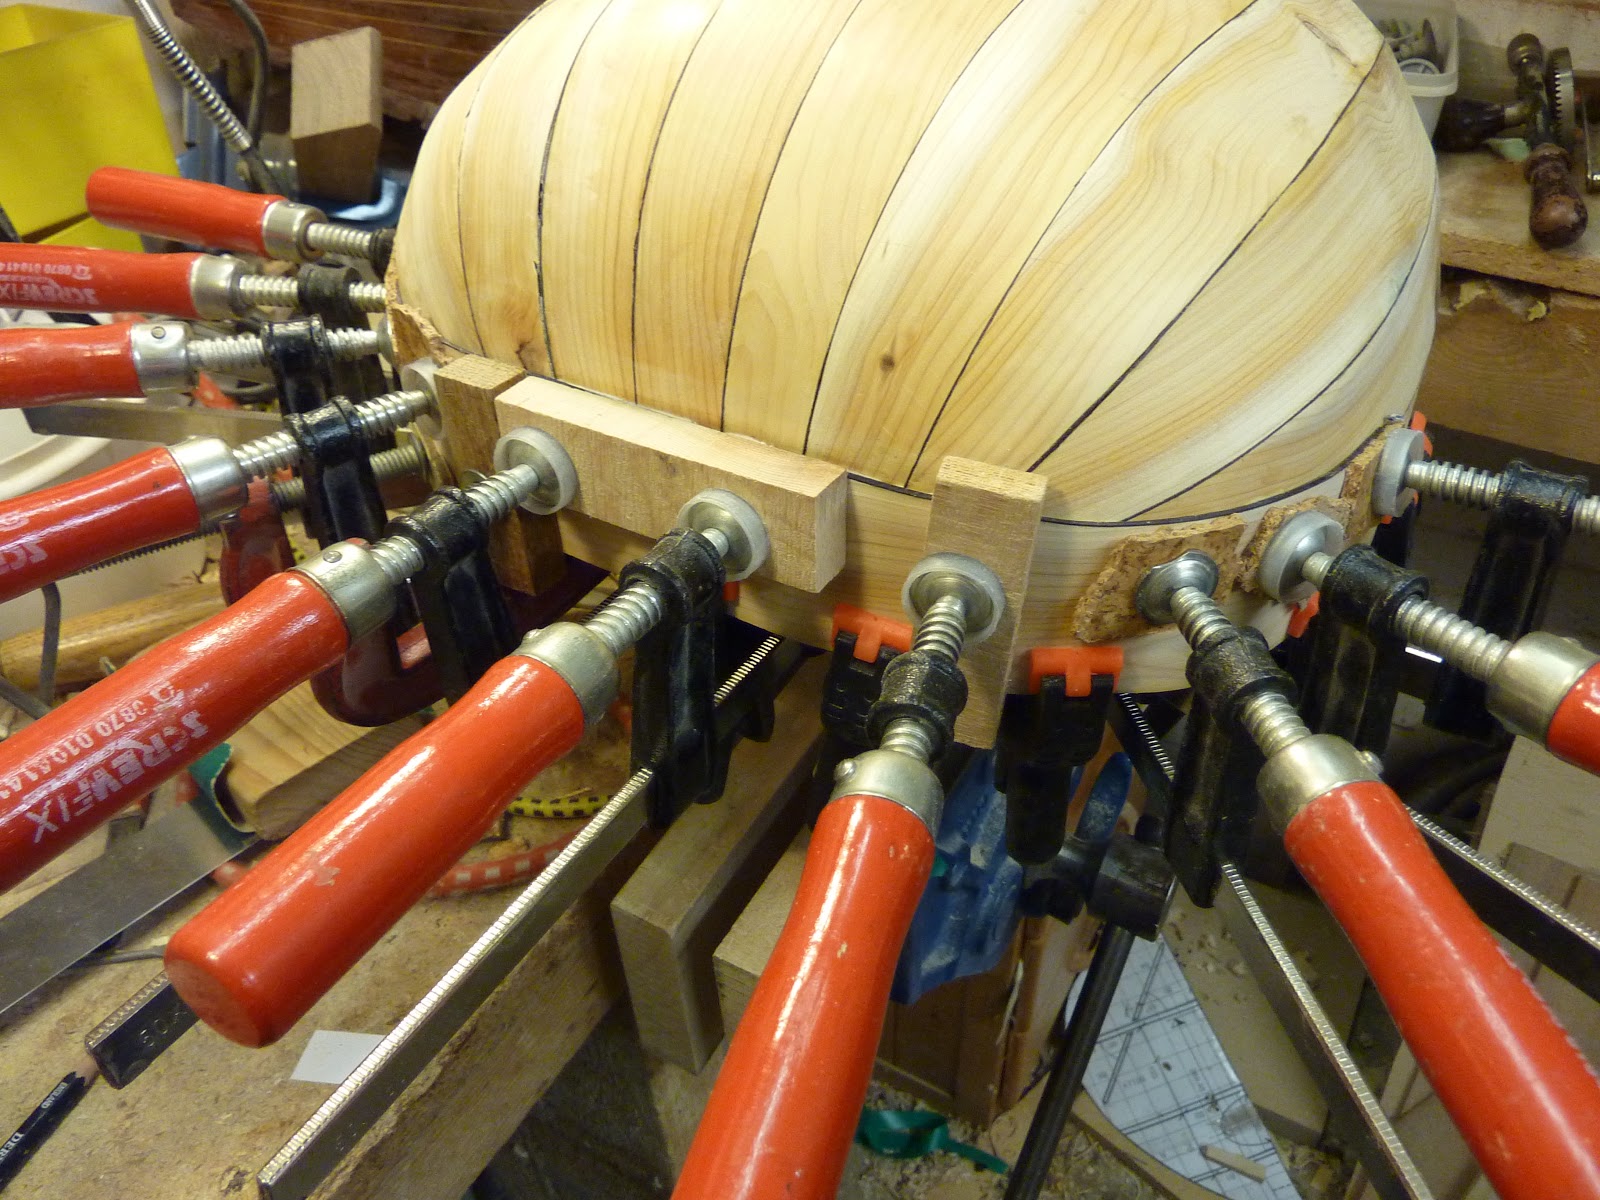
Meanwhile the mandocello bowl now has four ribs. I am finding these much easier to fit accurately - the walnut is a bit thicker, it has a very straight grain and the tailblock keep the ribs from peeling apart.

I much prefer the mandolin mould design, but the lesson from both instruments is that the mould should be as close to perfect as possible!

Sunday, November 25, 2012

Mandocello rib number two

Here is rib number two going onto the mandocello. I decided to find an alternative to the 'bungee cords' to hold the ribs in place during the gluing so I made these clamps. The threaded rod screws into a fitting set into the mould.  It seemed to work quite well.

Meanwhile, ribs ten and eleven were added to the lute. I am still finding it a struggle to get the ribs fitted neatly, and I think I will need to reinforce the bowl from the inside once it is removed from the mould.

Thursday, November 22, 2012

Mandocello ribs

The mould is now completed and waxed and I have fitted and shaped the neck and tail blocks. These were made from pine and are attached from the inside of the mould with screws. This allows the removal of the completed bowl, but it's also handy to allow the part completed bowl to be freed briefly from time to time to make sure that the ribs haven't become stuck to the mould!

The ribs themselves are made from walnut. I will need nineteen of them but I made 25 to allow for mistakes.These were sliced from a large block on a bandsaw (I didn't use a fence as I can get a better result by following a pencil line be eye).  The saw lines were 5mm apart, and after sawing the ribs were reduced in thickness on a drum sander to 2mm (the saw marks have just about gone at this thickness).

In the meantime, I am continuing to add ribs to the lute. Some go on nicely - other are a real struggle. I'm up to nine now, so only four to go!

Saturday, November 10, 2012

The mandocello mould takes shape

 Here is the mandocello  mould with all the infill pieces glued in place. These were cut out with a band-saw and thicknessed on a drum sander before gluing in place with Titebond.

In the second photo, the mould has been shaped and the recess for the tail block has been cut out. I have also removed a wedge shaped piece to accommodate the fold in the belly (just beyond the bridge). I did most of the shaping with an electric plane and finished off with an electric power file.  This made a huge quantity of wood chippings and dust!

I am going to mark the positions of all the ribs before giving the mould a wax coating.

Monday, October 29, 2012

Mandocello begins


I have finally started the mandocello. I have not tried anything on this scale up to now, and I'm also working more or less from my imagination! In the photo is the start of the mould/form. This is 12mm plywood, and I will be filling the 'spaces' with lime wood (lime is quite soft and easy to shape). This instrument will have a scale length of 680mm (a bit longer than the 'Gibson') which I hope will make the bottom 'C' string play better.

I am also planning to use carbon fiber as neck reinforcement, and also laminated into the belly bracing (a bit radical, this one - any comments welcome!).

Meanwhile, the fifth rib of the lute went on much more smoothly than the fourth one. I think it was a case of taking a bit more care!

Thursday, October 25, 2012

The fourth rib of shame

Here is the fourth rib fitted to the lute. I am finding working with the yew much more tricky than the walnut I used for the bowl-back mandolin.  The grain is REALLY wavy, and this means that I can't use a plane to trim the edges of the ribs to fit them together - there is too much tear-out. Files and sandpaper are the only things that work. I have also found that the black stained veneer that I am using for the spacers is difficult to bend accurately.

So why the shame? Well, I tried to fit the fourth rib with conventional Titebond wood glue, using tacks to squeeze the joint together and rubber straps to hold the ribs flat, as I had done before and...disaster! Gaps everywhere, nothing stayed in place properly and there was glue all over the place. So in the end I took it off, cleaned up the mess, improved the fitting and used Zap-a-Gap cyanoacrylic glue to stick on rib number four. I did this by working in short sections and started by gluing the black spacer on, followed by the rib.

It looks fine now, after a pass or two with a cabinet scraper, but I don't think that this is a good way to proceed. I guess in the end, that it comes down to the mould - this needs to be perfect in order to get the ribs to join properly.

Saturday, October 20, 2012

Pegs

I have had a first stab at turning pegs for the lute. It's only a practice run - the wood here is sycamore, rather than the pear wood that I will use in the end, and the peg is too large. But overall, not a bad first try!

When I come to the 'production run' I will probably make a jig for my lathe to follow a template in order to keep all thirteen the same size and shape.

Tuesday, September 18, 2012

The first two ribs

Here are the first couple of ribs (there will be thirteen in all) fitted to the lute form. The yew wood was taken to a thickness of 1.5mm on my drum sander before bending into the correct shape. The thin black dividers (I have always called them stringers - is that right?) are cut from maple veneer (0.6mm) stained black. These are bent to shape in a  hacksaw slot cut into the top of my bending iron.

The yew has a lovely grain, but it is really wavy and so it's very difficult to plane the side of the rib ready for fitting the next one. I have instead made much more use a small file for this step.

Monday, August 27, 2012

Lute form

I finished the bulk of the work on the 'form' for the lute today. It's made from sheets of pine stacked together (I'm saving my lime wood for the mandocello form).

As with the last one I made (the mandolin), I ended up attacking it with all sorts of different tools to try and get the right shape.  The included my block plane, an electric plane, a rasp, a spokeshave, a belt sander, a drum sander on an electric drill, chisels and gouges!

The electric plane and block plane were most effective for roughing it out, and the drum sander was great for  flattening it were the thirteen ribs will go.

On a completely different matter, we found a brown long-eared bat in the garden yesterday, so I took a video...:


Sunday, July 08, 2012

Lute ribs

I have finally started work on the lute. It will be based on a 1592 seven course alto lute by Venere and I will be guided by the plans in Robert Lunberg's book.

I am using yew wood for the bowl, and the first job was to cut up a block into 4mm slices. I will reduce these in thickness to about 1.6mm on my drum sander prior to bending them to fit the form.

Also on the drawing board is a bowl back mandocello - I will have to develop my own ideas for this one!